For any new orders/requests please feel free to use as usual: tech at esp8266-projects.com.
MPDMv4 Boards are also available on Tindie: AC MAINS Dimmer – MPDMv4
![]()
MPDMv4 by ESP8266-Projects.com is licensed under a Creative Commons Attribution-NonCommercial 4.0 International License.
And the story behind:
EVOLUTION.
The next step in the MAINS Power Dimmer/Switch series.
One of the main problem that people has been complained about was the fact that a simple MAINS Power Dimmer/Switch unit like the basic one presented last year is using sometime too much resources from a already overloaded application MCU/processor:
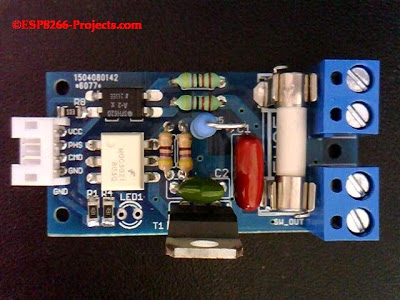 |
| MPDMv3 – MAINS Dimmer/Switch with Phase detection |
One of the scenarios, directly related with ESP8266 is about the limited timers capabilities that you have. For example, if you want to implement a proper web server to directly serve your webpages from ESP8266 you are automatically using one timer. If you want to start using the second one for your ZCD processing …well…it’s becoming very tricky. Very.
Don’t uderstand me wrong, a bigger, better MCU can do it probably very well, but even then if you have the chance to free some resources easily, do it!. And I really cannot see a ESP8266 acting as a App MCU (webserver, data logger, MQTT client, etc, etc) and doing reliable also other demanding functions as Processing Zero Crossing Detection.
SOLUTION?
I can see only one, and it is a lesson learned many years ago: keep your real-time processing functions away from your Application MCU/Processor. To do that we just need to move the ZCD processing function from the ESP8266/whatever MCU you want to the MPDM Driver itself:
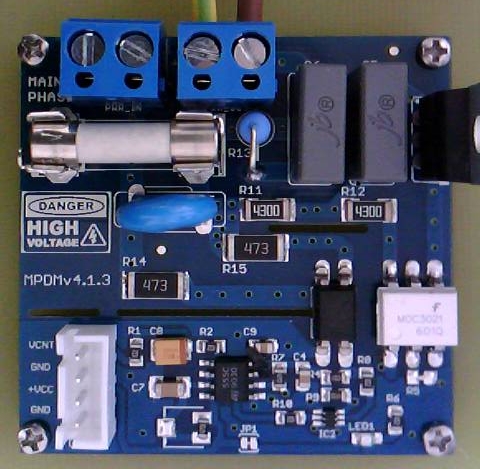 |
| MPDMv4 – MAINS Phase detection and ZCD processing |
What means that? means that in this new configuration our ESP8266 will be free from any type of real-time ZCD processing that is related with the MAINS Dimming process, you just need to send to the MPDMv4 driver a voltage (Vcontrol) in a pre-established range (0-3V for example) that will correspond with different desired Dimming levels.
What we have obtained? A UNIVERSAL MAINS Power Dimmer driver that can be used with any MCU you might want or even no MCU at all. You can dimm it even with a simple Potentiometer at input, no programming, no code, no nothing!!
Legend:
PURPLE – Phase detector output
BLUE – Reversed phase signal (normalised)
Yellow – Triac Driver CMD signal (PWM)
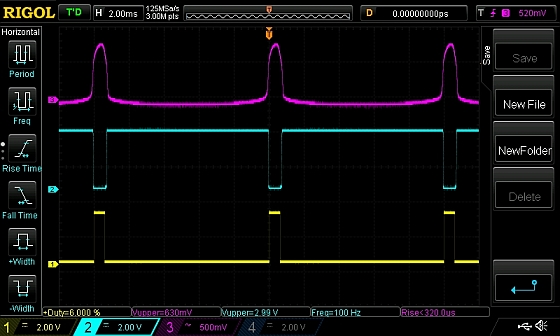 |
| Vcontrol = 0, CMD Duty cycle=6% |
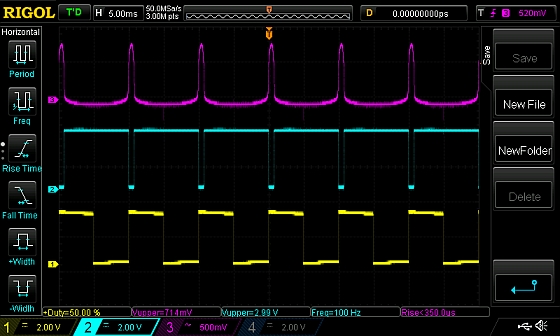 |
| Vcontrol = 2V, CMD Duty=50% |
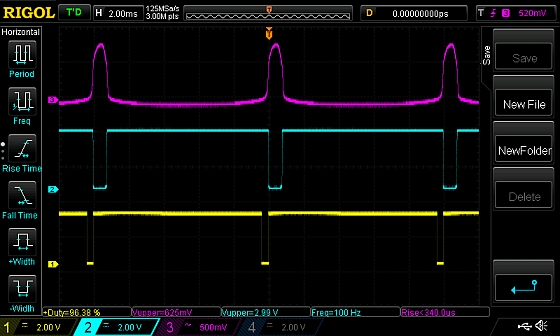 |
| Vcontrol = 2.8V, CMD Duty=96% |
How can be done that? Easy. Use PWM or a DAC, your choice. For ESP8266 I will recommend you to use a DAC, like the MCP4726 or, why not , the MCP4728, for a full 4 Channel MAINS Dimmers solution. PWM in case of the ESP8266..let’s say that is has some limitations that you will discover very soon that you don’t like 🙂
The mains advantages of using DAC?
Notable:
1. Very low to zero overhead on the App MCU
2. High precision (DAC from above are 12 bit!! – 4096 levels of dimming!!)
3. You can use the “set-and-forget” technique using DAC internal nonvolatile memory (EEPROM) and have the same level on the next power-off/on cycle.
IMPLEMENTATION
SCHEMATICS
As the only functional difference between the previous MPDMv3 MAINS Dimmer and the new MPDMv4 is the presence of the ZCD function onboard, basically, without some small bits and pieces around like the MOV protection circuit, you can see it exactly as it is: a MPDMv3 with a ZCD circuit onboard:
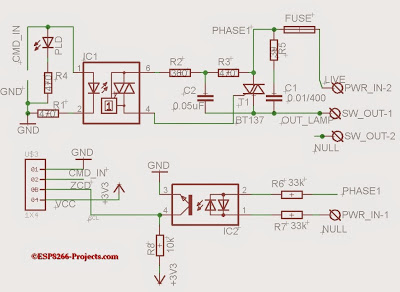 |
| MPDMv3 – Phase detection and Triac control |
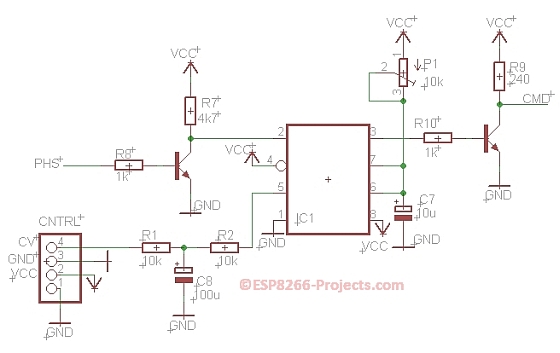 |
| Zero crossing detector circuit |
MPDMv4 PCB:
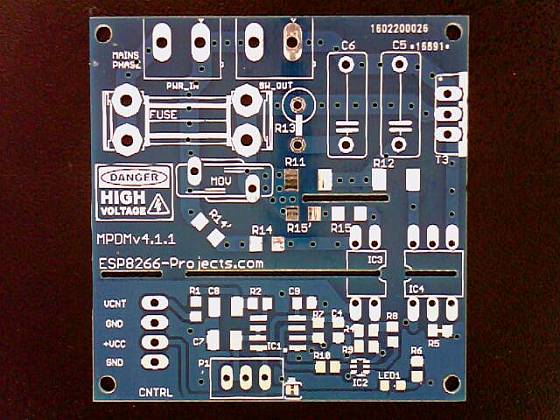 |
| MPDMv4 PCB |
As you can see from the above picture, it was carefully designed with proper MAINS isolation from the rest of the driver, you can see even the extra isolation slots done for a even bigger Creepage distance.
And because I know this terms still creates some confusion, short definitions below:
CLEARANCE is the shortest distance in air between two conductive parts.
CREEPAGE distance means the shortest distance along the surface of a solid insulating material between two conductive parts.
A creepage distance cannot be less than the associated clearance so that the shortest creepage distance possible is equal to the required clearance. However, there is no physical relationship, other than this dimensional limitation, between the minimum clearance in air and the minimum acceptable creepage distance.
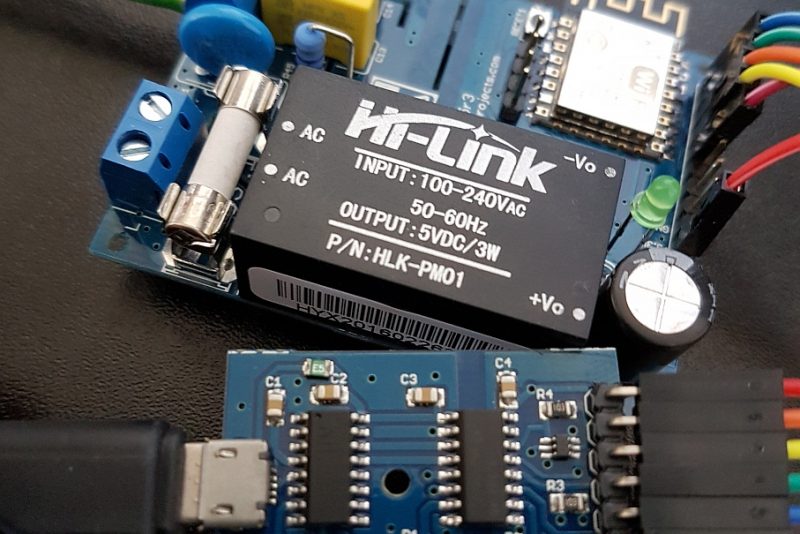
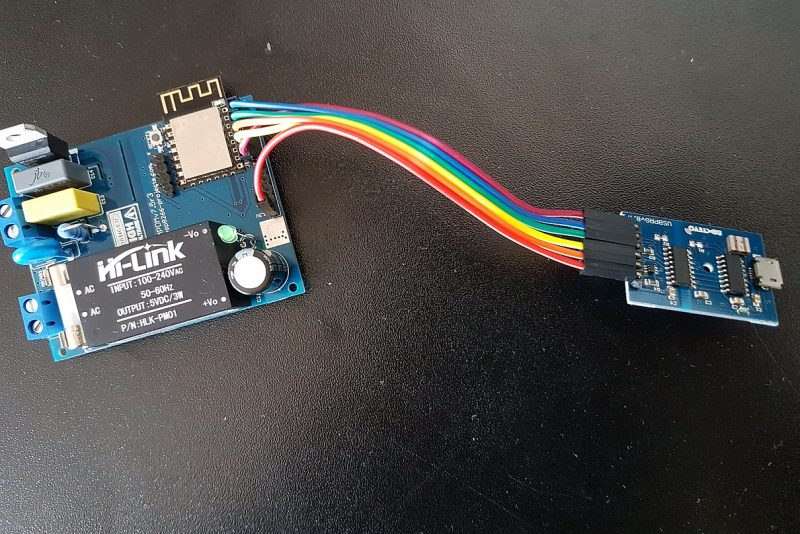
And the new, freshly baked result:
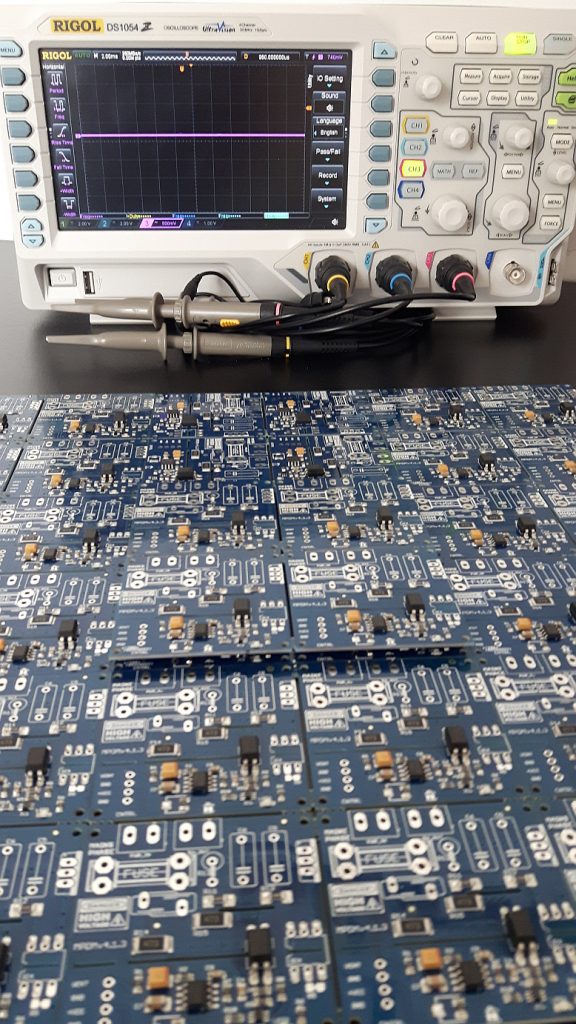 |
| MPDMv4 – MAINS Power Dimmer/Switch with Phase detection and ZCD Processing |
Next time we will move on to the Software side, to see what is going on with our Webserver interface & stuff.
1 Comment
Alex · March 21, 2018 at 7:49 pm
Hi,
What is the fuse rated on MPDMv4 board?
I need to dim 10 x 10 watt led bulbs @ 120 VAC.
Is there enough juice in the board?
Regards,
Alex